

ADOBE ILLUSTRATOR CC
In this part, I will be giving you the knowledge of the tools present in Adobe Illustrator CC 2018 and after. So playing out with the tools is very amazing after all. The first time we learnt MS Paint was very interesting, right. Here, you will get the same nature of learning new things in Adobe Illustrator CC.
If you don't know what is Adobe Illustrator, then you can go to my page where I have beautifully explained what is it :
WHAT IS ADOBE ILLUSTRATOR?
So, I hope you have taken a look over the software.
Let's dive into the mainland :
ALL ABOUT TOOLS-01
01. SELECTION TOOL :
So what is selection tool?
 |
| SELECTION TOOL |
You can guess its work correctly from the name that its main function would be to select all the shapes that you work with within the workspace.
Yes, it is a major function.
Along with it, the Selection Tool also helps to resize, rotate, move the shape around your workspace.


Yes, it is a major function.
Along with it, the Selection Tool also helps to resize, rotate, move the shape around your workspace.
MAKING UNIFORM SHAPES:
As I am talking about moving resizing and rotating, we should keep a note that we can either do these functions formally or informally. So formally literally means uniformly and informally mean non-uniformly. Suppose, we want to make a square, and we know that a square has 4 equal sides. Moreover, we cant give a guarantee that our shape would become perfect square.
As I am talking about moving resizing and rotating, we should keep a note that we can either do these functions formally or informally. So formally literally means uniformly and informally mean non-uniformly. Suppose, we want to make a square, and we know that a square has 4 equal sides. Moreover, we cant give a guarantee that our shape would become perfect square.
So for that, we have a shortcut key :
PRESS SHIFT KEY WHILE MAKING THE SHAPE.

As you can see a uniform square drawn with the help of the given shortcut.
It will give you a perfect square at last.
COPYING OBJECT:
You can also copy a shape by using the below shortcut key:
You can also copy a shape by using the below shortcut key:
PRESS ALT KEY WHILE MOVING THE SHAPE.

Now you can see those small circles near the vertices. Ther are used for making a sharp vertice rounded, as you can see below.
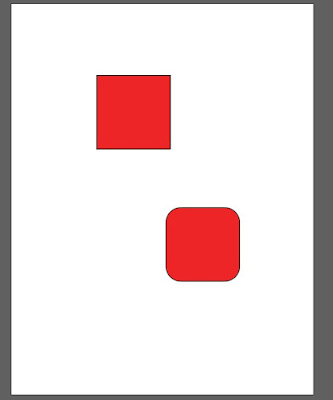

You can see the second figure having a curved corner. That's caused due to that circle. And these feature is present only in ADOBE ILLUSTRATOR CC 2018 and above.
RESIZING:
You can also change the size by simply dragging the handles of the shape present in the outline.
You can also change the size by simply dragging the handles of the shape present in the outline.

You can see the hinges clearly in the above picture. Those are the square boxes on the outline which act as handles for your shape.
SELECTION:
You can also select multiple shapes at once using this selection tool as well.
You can also select multiple shapes at once using this selection tool as well.
So what you have to do is, first select your first shape then hold the Shift key then click on another shape. If you want to select multiple shapes, you can do it in the same manner.

You can see that the two shapes are selected as one.

You will find this tool just beside the Selection tool.
Now you might be thinking what's the difference between the Selection tool and the Direct selection tool.
The main difference is that while you work with the Selection tool, you deal with the handles provided with the shape, right. But in the Direct selection tool, you will be dealing with anchor points which act like door hinges.
As the door is fixed to its hinge, similarly the shapes are also fixed to the anchor points and they always move about their anchor.

You can see the anchor in the image. I suggest you to go ahead, and observe the anchors, their properties.
Now, these Anchor points are a basic component of a shape. The shape of a figure is decided by these anchors only. And you will also observe that these anchor points become visible only when you select the Direct Selection Tool. Upon opening the Selection tool you will see the handles.
Now lets come back to the topic...
 Now you can also resize the shape as I have told you.
So to change the shape, just select one of the anchors, instead, you can select any number of anchors by holding SHIFT KEY while selecting the anchors. After selecting any anchor, take your cursor to it and hold it and drag it in any direction of your choice of the shape you wanted.
Using this tool also you can change the sharp vertices into rounded vertices.

You can see that I have changed the square into a random shape just by holding and dragging the anchors of the figure.

I have made this figure by simply clicking on the upper anchor and dragging it below, of the previous image.

I have selected the two anchors of the above arm of the previous image and dragged it upwards to get this figure.
Now, just to the right corner of the Direct Selection Tool, you will see an arrow which indicates that it has a sub-menu of tools as you can observe below...

You can see that on holding the direct selection for some time, it will open a list of tools.
So you can see the Group Selection Tool. It is very similar to the Direct Selection Tool, only the difference is that when you click on an anchor in a path you will be selecting as many anchors present in that particular path.
So I have discussed the two basic but important tools.
EXTRA: ANCHOR AND PATH
Now I will discuss about anchor and path in short...
 You can see that when I hover my cursor over the line it shows the path guide.
[ You can open the guides by switching on SMART GUIDES under VIEW TAB]
Path is a connection or a guide to the shapes. As a guide for shape, all the lines, curves are nothing but a path having strokes. So basically we are dealing with the paths and the endpoints of these paths are the anchor points.
We all know about the line segment, right. As line segment has two endpoints, similarly we can compare our path to a straight line.
WITH THIS WE COME TO THE END OF TODAYS CLASS. I HOPE YOU WILL PRACTICE AT HOME...
02. DIRECT SELECTION TOOL:
Now, let us know about the direct selection tool...

You will find this tool just beside the Selection tool.
Now you might be thinking what's the difference between the Selection tool and the Direct selection tool.
The main difference is that while you work with the Selection tool, you deal with the handles provided with the shape, right. But in the Direct selection tool, you will be dealing with anchor points which act like door hinges.
As the door is fixed to its hinge, similarly the shapes are also fixed to the anchor points and they always move about their anchor.

You can see the anchor in the image. I suggest you to go ahead, and observe the anchors, their properties.
Now, these Anchor points are a basic component of a shape. The shape of a figure is decided by these anchors only. And you will also observe that these anchor points become visible only when you select the Direct Selection Tool. Upon opening the Selection tool you will see the handles.
Now lets come back to the topic...

So to change the shape, just select one of the anchors, instead, you can select any number of anchors by holding SHIFT KEY while selecting the anchors. After selecting any anchor, take your cursor to it and hold it and drag it in any direction of your choice of the shape you wanted.
Using this tool also you can change the sharp vertices into rounded vertices.

You can see that I have changed the square into a random shape just by holding and dragging the anchors of the figure.

I have made this figure by simply clicking on the upper anchor and dragging it below, of the previous image.

I have selected the two anchors of the above arm of the previous image and dragged it upwards to get this figure.
Now, just to the right corner of the Direct Selection Tool, you will see an arrow which indicates that it has a sub-menu of tools as you can observe below...
So you can see the Group Selection Tool. It is very similar to the Direct Selection Tool, only the difference is that when you click on an anchor in a path you will be selecting as many anchors present in that particular path.
So I have discussed the two basic but important tools.
EXTRA: ANCHOR AND PATH
Now I will discuss about anchor and path in short...

[ You can open the guides by switching on SMART GUIDES under VIEW TAB]
Path is a connection or a guide to the shapes. As a guide for shape, all the lines, curves are nothing but a path having strokes. So basically we are dealing with the paths and the endpoints of these paths are the anchor points.
We all know about the line segment, right. As line segment has two endpoints, similarly we can compare our path to a straight line.
WITH THIS WE COME TO THE END OF TODAYS CLASS. I HOPE YOU WILL PRACTICE AT HOME...


0 Comments
Please put spam free comments only